Use CSS in Blockly
6. Blocks
In this section, you will create CSS rules to assign the colours used by the blocks section of the themes codelab to the logic, loops, text, and lists blocks. This is a bit more complex than setting component or category colours and you'll do it in several steps.
Block fill and stroke
Your first step is to set the fill and stroke of the logic blocks.
Note that setting the fill and stroke is specific to the
renderer
you are using. (In this codelab, you are using the Thrasos renderer.) An
important consequence of this is that you need different CSS for different
renderers.
Identify the block element
Drag an if do block onto the workspace and find it with the element inspector:
<body>
  <div class="blocklyDiv">
    <div class="injectionDiv">
      <svg class="blocklySvg">
        <g class="blocklyWorkspace">
          <g class="blocklyBlockCanvas">
            <g class="controls_if blocklyBlock logic_blocks">
Notice that the block's <g> element has classes for the block's type (controls_if) and style (logic_blocks). These are the values of the type and style properties in the block's definition. You will use the style class to assign the same colour to all of the logic blocks.
(If you were building blocks from scratch and wanted to avoid themes, you would assign this class with the classes property in the block definition. However, because these are standard blocks and they were built with themes in mind, using the style class works just as well.)
Choose an element to use
Next, you need to decide what element to use in your colour rule. The <g> element identifies the block but doesn't draw it. Instead, you can use the <g> element's first child. This is a <path> element with fill and stroke presentation attributes, which are easily overridden.
Note that different renderers use different numbers of <path> elements to
draw a block: Thrasos uses a single <path> element, Geras uses three <path>
elements, and Zelos uses one <path> for the outside of the block and one
<path> for each inline input.
Choose colours
The last step before writing your colour rules is to decide what colours to use. The Halloween theme in the themes codelab sets three colours:
    'logic_blocks': {
      'colourPrimary': "#8b4513",
      'colourSecondary':"#ff0000",
      'colourTertiary':"#c5eaff"
    },
How these colours are used depends on the renderer. The Thrasos renderer uses
the primary colour as the fill of the block, the tertiary colour as the
stroke, and the secondary colour as the fill when the block is a
shadow block.
Add your rules
You're now ready to add your rules to set the fill and stroke of the logic blocks:
/**********/
/* BLOCKS */
/**********/

/* LOGIC BLOCKS */

.logic_blocks > .blocklyPath {
  fill: #8b4513;
  stroke: #c5eaff;
}

.logic_blocks.blocklyShadow > .blocklyPath {
  fill: #ff0000;
  stroke: none;
}
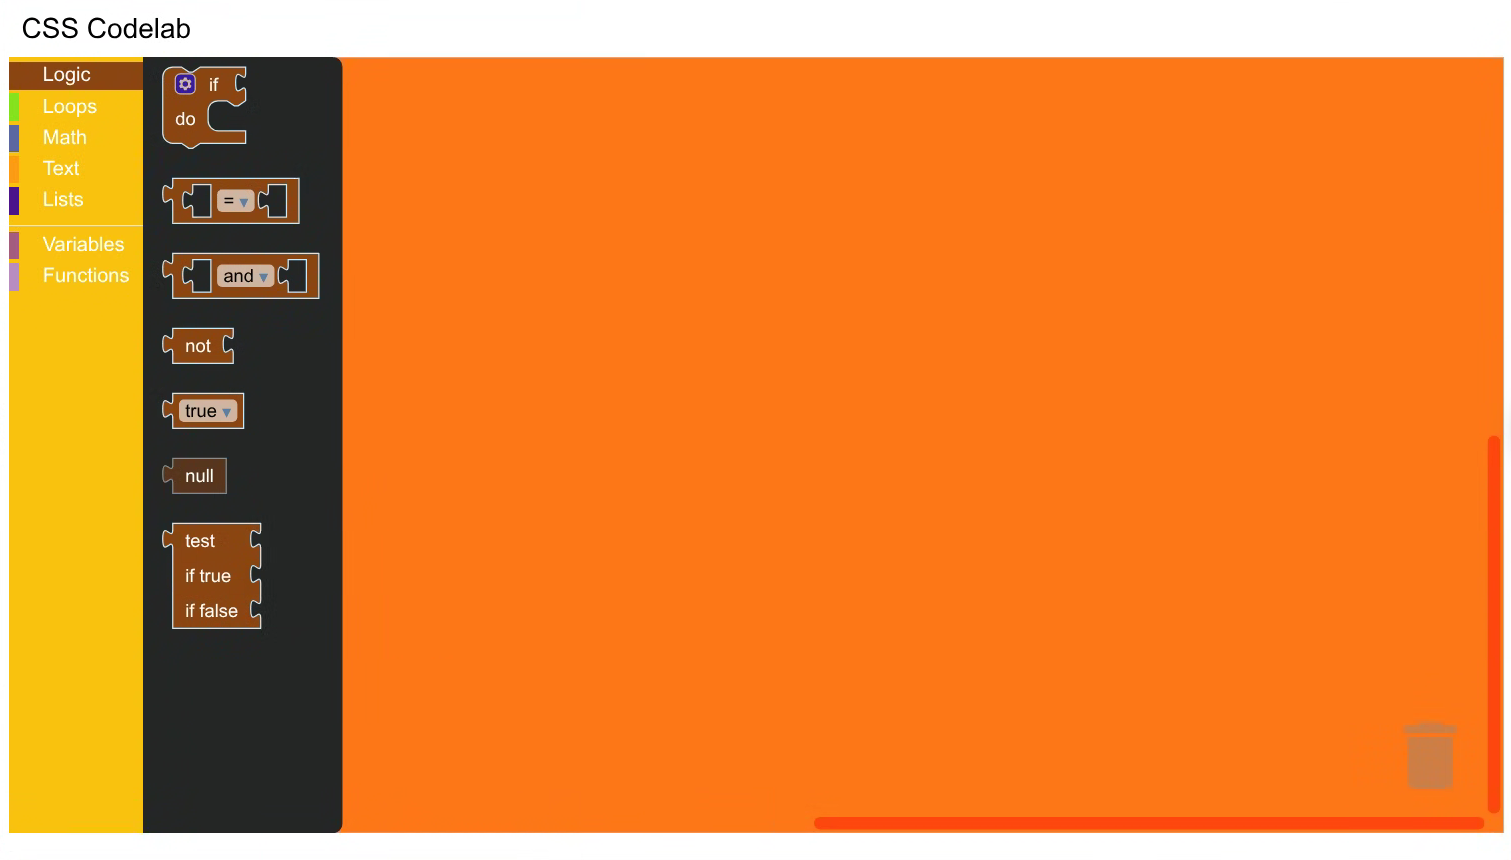
Refresh your web page and open the Logic category. You should see that the
logic blocks are now rendered in autumnal brown instead of blue:
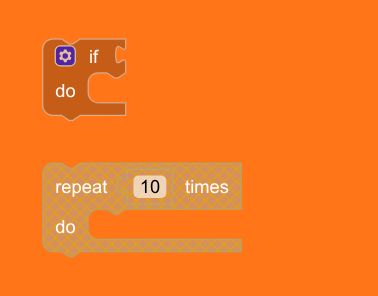
Disabled blocks
Your next step is to handle disabled blocks. Drag an if do block and any block from the Loops category onto the workspace. Right-click on each block and disable it using the context menu. Notice that the loop block has a cross-hatch pattern while the if do block does not:
This is because the rules you just added have the same specificity as the Blockly rules that set the cross-hatch pattern. (You can see this if you click on the if do block's <path> element and inspect its styles.) Because your rules occur later in the document, they take precedence. To use the standard CSS for disabled blocks, add a :not(.blocklyDisabledPattern) to your rules:
/* LOGIC BLOCKS */

.logic_blocks:not(.blocklyDisabledPattern) > .blocklyPath {
  fill: #8b4513;
  stroke: #c5eaff;
}

.logic_blocks:not(.blocklyDisabledPattern).blocklyShadow > .blocklyPath {
  fill: #ff0000;
  stroke: none;
}
Refresh your page, drag the if do block onto the workspace, and disable it. It should now use the disabled pattern:

Dropdown arrows
You now need to handle dropdown arrows. Drag a logic comparison block onto the workspace and look closely at the inverted triangle in the dropdown field -- it's blue even though the rest of the block is brown:

If you look at the triangle with the element inspector, you'll see that it's a character in an SVG <tspan> element:
<body>
  <div class="blocklyDiv">
    <div class="injectionDiv">
      <svg class="blocklySvg">
        <g class="blocklyWorkspace">
          <g class="blocklyBlockCanvas">
            <g class="logic_compare">
              <g class="blocklyDropdownField">
                <text class="blocklyDropdownText">
                  <tspan style="fill: rgb(91, 128, 165);"> ▾</tspan>
You can also see that its colour is set with a style attribute, which can only be overridden with an !important declaration. To do this, add the following rules:
.logic_blocks > .blocklyDropdownField .blocklyDropdownText tspan {
  fill: #8b4513 !important;
}

.logic_blocks.blocklyShadow > .blocklyDropdownField .blocklyDropdownText tspan {
  fill: #ff0000 !important;
}
Reload your page and drag the comparison block out again. The arrow should be the same colour as the rest of the block:

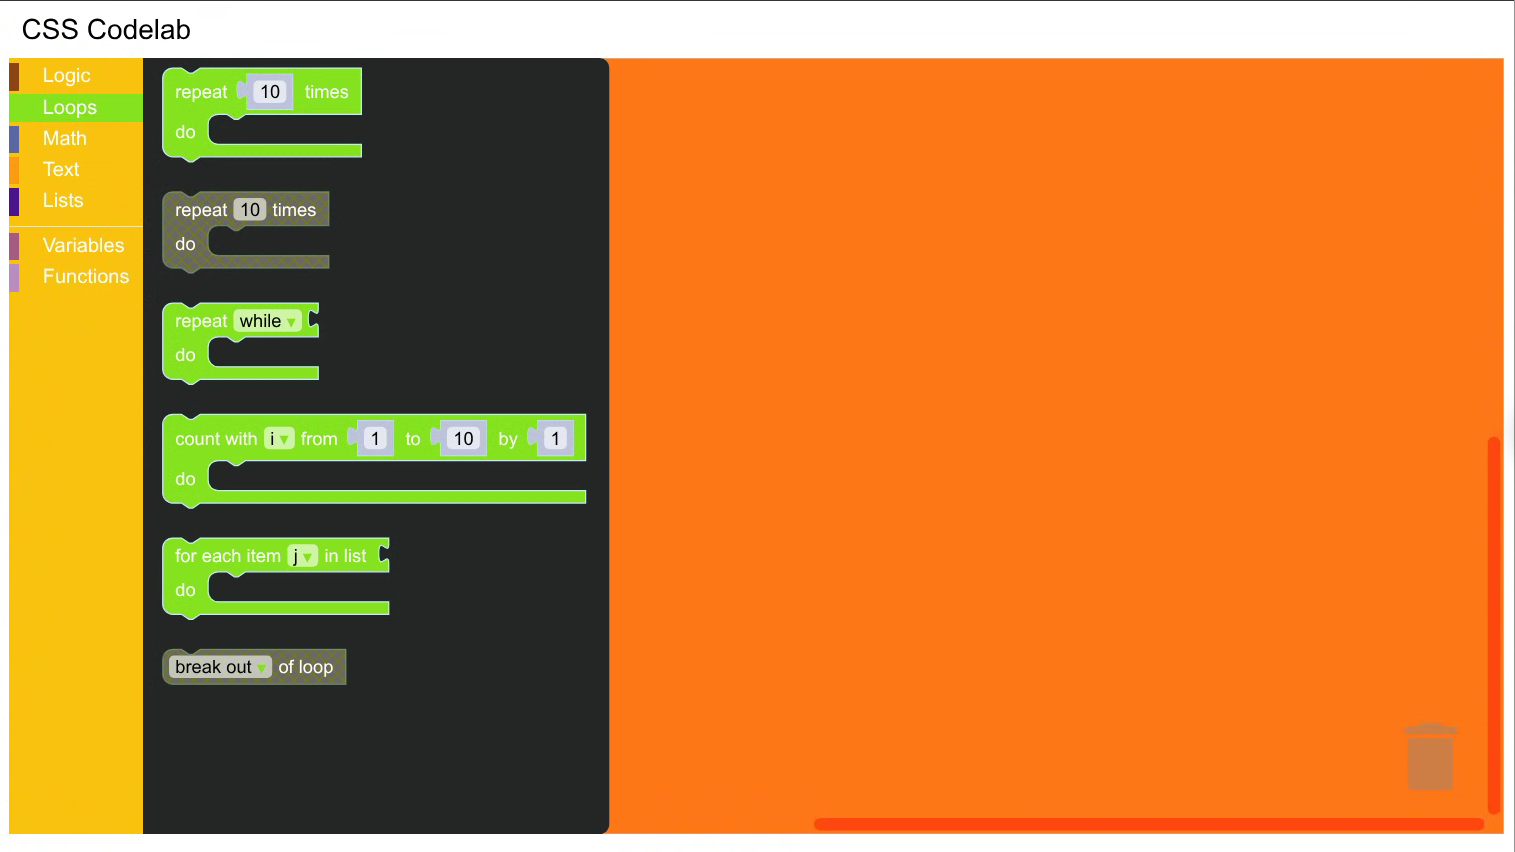
Loop, text, and list blocks
Your last step is to add similar rules for the loop, text, and list blocks:
/* LOOP BLOCKS */

.loop_blocks:not(.blocklyDisabledPattern) > .blocklyPath {
  fill: #85e21f;
  stroke: #c5eaff;
}

.loop_blocks:not(.blocklyDisabledPattern).blocklyShadow > .blocklyPath {
  fill: #ff0000;
  stroke: none;
}

.loop_blocks > .blocklyDropdownField .blocklyDropdownText tspan {
  fill: #85e21f !important;
}

.loop_blocks.blocklyShadow > .blocklyDropdownField .blocklyDropdownText tspan {
  fill: #ff0000 !important;
}

/* TEXT BLOCKS */

.text_blocks:not(.blocklyDisabledPattern) > .blocklyPath {
  fill: #fe9b13;
  stroke: #c5eaff;
}

.text_blocks:not(.blocklyDisabledPattern).blocklyShadow > .blocklyPath {
  fill: #ff0000;
  stroke: none;
}

.text_blocks > .blocklyDropdownField .blocklyDropdownText tspan {
  fill: #fe9b13 !important;
}

.text_blocks.blocklyShadow > .blocklyDropdownField .blocklyDropdownText tspan {
  fill: #ff0000 !important;
}

/* LIST BLOCKS */

.list_blocks:not(.blocklyDisabledPattern) > .blocklyPath {
  fill: #4a148c;
  stroke: #cdb6e9;
}

.list_blocks:not(.blocklyDisabledPattern).blocklyShadow > .blocklyPath {
  fill: #ad7be9;
  stroke: none;
}

.list_blocks > .blocklyDropdownField .blocklyDropdownText tspan {
  fill: #4a148c !important;
}

.list_blocks.blocklyShadow > .blocklyDropdownField .blocklyDropdownText tspan {
  fill: #ad7be9 !important;
}
And that's it! Reload your page and explore the blocks in your Halloween-themed editor: