Customizing a Blockly toolbox
3. Change the look of a category
Change the background of the category
In the default ToolboxCategory class, the addColourBorder_ method adds a strip of color next
to the category name. We can override this method in order to add colour to the entire category div.
Add the following code to your CustomCategory class.
/** @override */
addColourBorder_(colour){
  this.rowDiv_.style.backgroundColor = colour;
}
The colour passed in is calculated from either the categorystyle or the colour
attribute set on the category definition.
For example, the "Logic" category definition looks like:
<category name="Logic" categorystyle="logic_category">
...
</category>
The logic_category style looks like:
"logic_category": {
    "colour": "210"
  }
For more information on Blockly styles please visit the themes documentation.
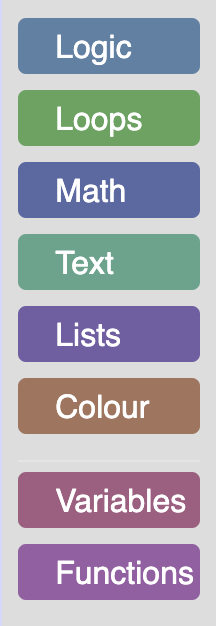
Add some CSS
Open index.html to see your updated toolbox. Your toolbox should look
similar to the below toolbox.
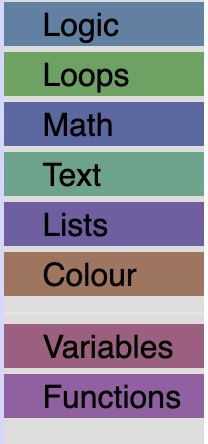
We are going to add some CSS to make it easier to read, and to space out our categories.
Create a file named toolbox_style.css in the same directory as index.html
and include it in index.html:
<link rel="stylesheet" href="toolbox_style.css">
Copy and paste the following CSS into your toolbox_style.css file.
/* Makes our label white. */
.blocklyToolboxCategoryLabel {
  color: white;
}
/* Adds padding around the group of categories and separators. */
.blocklyToolboxCategoryGroup {
  padding: 0.5em;
}
/* Adds space between the categories, rounds the corners and adds space around the label. */
.blocklyToolboxCategory {
  padding: 3px;
  margin-bottom: 0.5em;
  border-radius: 4px;
}
The result
Open index.html to see your toolbox.